Peeuw!

on Tuesday, March 29, 2011

The onion shipment has arrived! These were ordered from Dixondale Farms back in January... even though I also start some of my own from seed. I've found I have better luck with leeks started from seed than onions, and ordering from a reliable source has had better results for me than the cheap bags of sometimes moldy, often wimpy and rarely named sacks of onion sets we can buy locally.

Boy oh boy is this box strong smelling!

These plants may not look like much right now, and they won't even get to go in the soil for a little while - it's just too darn cold out - but if all goes well, we'll have lots of yummy onions come summertime!

The varieties here, just in case you're interested in looking them up, are Big Daddy, Candy, Cippolini, Red Zeppelin, Red Candy Apple, Walla Walla and Yellow Spanish.
Published with Blogger-droid v1.6.3

Helper

on Sunday, March 27, 2011

Really Tucker? I've been doing this for enough years now that I think I've got it figured out. I wasn't really looking for assistance.
Published with Blogger-droid v1.6.3

The Flip Side

on Tuesday, March 22, 2011

Ignore the mess in the background - this picture shows the right side of the greenhouse, where you can see I got the very first shelf (front right) installed with a bit of a forward tilt. Oops. While stuff still easily stays on the shelves - nothing goes rolling off - I'm sure I'll always shoot evil glares at that shelf like it's the red-headed stepchild.


Now to finish filling the new raised beds with good potting soil, and get some growies in there!! And I suppose I should finish cleaning out the mess in there as well...

Big garden project: Almost Done!

on Monday, March 21, 2011

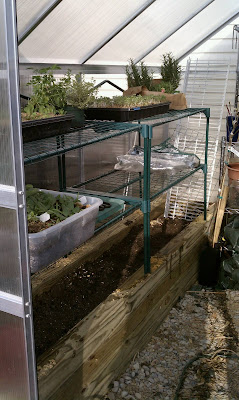
Spent a big chunk of the last two days cleaning out winter experiments from the greenhouse, and items stored in the greenhouse over winter, and then building raised beds on either side which are then topped with "mini greenhouses" - the kind you buy at most big box stores that are typically made of green metal poles, plastic and wire shelves, covered with an optional clear plastic zip up cover.

I built the raised beds out of 4x4s, filling them with leftover potting soil from last year's pots, bagged composted manure and top soil, homemade compost, and bagged potting/veggie mix.

Each raised bed then had deep 5/8" holes drilled down into the front and back walls, which had 18" rebar stakes fit into them. Most of the rebar sticks out, over which I fit the green metal posts that run vertically in the mini greenhouses. From there I built up two layers of the greenhouse, basically splitting each mini greenhouse into two halves.

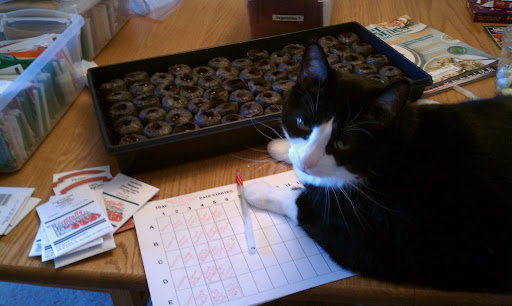
My plan is to try growing parthecarpic cukes and squash, and maybe a tomato plant or two, INSIDE the greenhouse this summer, using the raised beds. Before it's time for that the shelves will get used for seed starting and hardening off started in the basement. Stuff started indoors can't go straight outside... it's too drastic of a change for the plants.

Before too much longer I'll try starting the female-only veggies out in the raised beds... Hopefully they'll do well and start producing long before plants outside are doing their thing. Like squash, tomatoes, cukes etc can't go outside until late May around here!

The support braces under each wire shelf should double as support for tomatoes and cukes grown in the greenhouse.

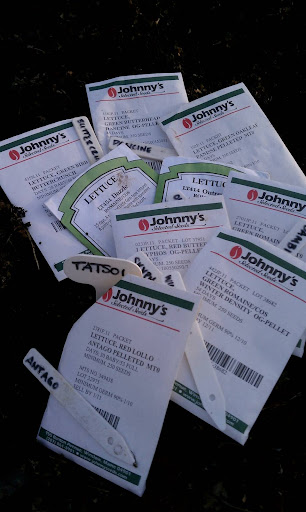
Then come fall I plan to switch over to fall and winter veggies. Think spinach, lettuce, chard, kale, Asian greens, and who knows, maybe carrots??? Anything I hoped to grow out there last winter froze. But using Elliott Coleman's winter harvest technique, I hope this coming winter will be different. I can add layers of clear plastic domes and/or the mini greenhouse zip up covers to create buffered pockets, hopefully convincing the plants that they're a couple hardiness zones south of here. I can't do this to the point of growing heat loving plants like tomatoes - it's not just warmth they need. There's also the issue of daylight hours... those plants require a lot more sunshine each day to keep producing, and we have many days here in NE Ohio where we get less than 10 hours of sunlight. (Sounds depressing, doesn't it?)

Anyhow... this is all a revision on the greenhouse experiment... we'll see how it goes!
Published with Blogger-droid v1.6.3

Working hard

on Thursday, March 17, 2011

I was done planting seeds when I took this (seed the pelleted lettuce seed?). Looks like the worm came up to see what I was doing and then decided to get back to work.
Published with Blogger-droid v1.6.3

Yup, it's that time!

Who's hungry?

Ok, it's going to be a little while before we're eating yet, but it IS time to get the party started!
Published with Blogger-droid v1.6.3

The Importance of Soil Testing - pt 2

San Jose garden guru Jessica Vaughn follows up with part two of her article series, The Importance of Soil Testing:

Once you’ve finished the calculations for each area, simply evenly add the measured amount of amendments to each bed and then turn the soil with a rake or shovel and water the area enough to set the soil and allow the amendments to be absorbed.

Continue reading on Examiner.com: Soil testing - it’s only the most important thing you can do for your garden.(2)

As I said yesterday, this girl knows her stuff. I often find myself checking in with Jess for her opinion or brainstorming on a gardening idea, or to see what her experience has been with something. I know she likes to grow fava beans and, well, this year I've decided to give them a try. So it won't be much longer here before I'm picking through her older blog postings to see what all she has had to share on the fava beans. But in the meantime, if you're considering veggie gardening, do check out the first and second parts of her article on how to do your own soil tests!

The Importance of Soil Testing - pt 1

on Wednesday, March 16, 2011

Intrepid garden reporter in San Jose offers up the first of a two parter about why soil testing is very important for all veggie gardeners. Here's the teaser:

If you’ve been wondering why your vegetable garden last summer didn’t perform as well as the summer before or you’re just looking for the best way to prepare your vegetable garden for the coming season, the answer is: soil testing.

Continue reading on Examiner.com: Soil testing - it’s only the most important thing you can do for your garden.

Trust me, this girl knows her stuff. We've been online internet buds for, wow, a few years now? Jess was doing the raised bed gardening thing before me, and she's so much better about testing and amending her soil each season. I tried to follow her lead last year and do the home testing of my veggie bed soils, and I just never seem to have any luck - my "tinted water" that's supposed to be the crystal ball letting me know what's going on in the soil just always seems too clear.

Maybe I'll give it another go this year!? I totally trust Jessica's advice and instructions, and accept that it's just something I haven't done quite right. I tend to just wing it, adding more good stuff to improve the soil, but sooner or later this blind amending of the soil's going to bite me in the butt!

Seed starting: Trying something new

on Monday, March 7, 2011

This year I'm trying a mix of the Jiffy 7 expanding peat pots that I like so much (upper right) and soil blocking, where you compress a very damp mixture in a block making tool, and then a spring mechanism is used to squirt out the blocks. I should buy more jiffy 7s (which I just ran out of) in case my soil blocks are a complete failure... To make soil blocks, you need a different soiless mixture than the peat pots use... it needs to hold more water and bind together better to maintain its shape. The soil blocks you see above are using two different sized/shaped plugs... the small ones are intended for seed starting, but we'll see if the large squares aren't better for starting multiple seeds (I'll snip out all but the best looking sprout in each group).
Published with Blogger-droid v1.6.3

It's very different way over on the coast...

on Wednesday, March 2, 2011

Just came across an interesting article with a Comparison of Bay Area CSAs, which is written by my internet buddy Finny (aka Jessica), waaaay out in California where it's warm and they can grow more things, and they have much longer growing seasons. That definitely seems to affect what the CSAs are like out that way!

You want proof? Check out this really informative spreadsheet comparing CSAs that are local to San Jose. Then again, I suppose we could provide many more of the options in some of these CSAs if Mary or I had way more property, had chickens in our backyards (trust me, we both want 'em!), and had been established for a longer period of time. I actually have been planting a variety of fruit trees in my yard (most of which won't produce for at least 2-3 more years), and this is the first year I'll be able to harvest from my dinky crop of asparagus.

While there might come a time where I can actually include some asparagus or, who knows, maybe even apples or Asian pears in the CSA shares (gimme a few years!), I wouldn't recommend holding your breath on getting homegrown oranges or lemons. ;-)